I had a lovely surprise (okay, not so much a surprise) on my doorstep today after the mail carrier left. A big ol' box of yarn from Knit Picks! I have been watching the yarn travel across the country on its way to me. It kept telling me it was destined to arrive on Monday. But they always over-estimate with Knit Picks. It arrived today (and hopefully I'll be able to knit something up with it soon!).
First of all, I opened up the box and found this deliciously yummy KnitPicks Shine Worsted in Marmalade. It just sounds good, doesn't it? This will be the perfect color for Autumn and Winter. I don't normally choose or get to knit with something so bold, so I'm pretty excited about this one. It's a very bold, rusty orange and it's going to be knit into something very beautiful and soft and functional for a friend of mine, T. I asked her a little while back to create a design logo for me and my Etsy shop. We came to an agreement that she would design the logo and I would knit her something fun to match her winter wear. She's sent me a few samples of logos and I'm still choosing which I like best. :)
When J & I went on our weekend trip a couple weeks ago, we had the chance to visit the book store. Any more I don't go to bookstores to read fantasy, instead I head straight to the fibre & fabric craft section and look over all the pattern books! So this time, I picked up a couple Debbie Bliss baby books, each for a specific pattern (although there were many more than just 1 pattern per book that I want to knit!).
I've been wanting to find X a good toddler bathrobe for a while now. Most of the ones I've found are too small or too "baby." Well one of these books had the perfect little bathrobe! And good thing I found it sooner rather than later because the pattern only goes up to 24 mo (I'm sure I could figure out how to make it bigger but my brain isn't up for that sort of math right now). I found some deep jewel blue yarn - Cotlin DK in Planetarium, which will be trimmed in Canary. It's going to be lovely, I think.
And the second pattern is Sweater with Ribbed Yoke. This will be Comfy Sport in Planetarium with the potential for a little bit of gray trim in Whisker. :) I think this is going to look fantastic on X, especially with his big blue eyes and long eyelashes.
So it all makes for one big, happy pile of yarny goodness! (I also got a couple goodies for my swap partner in the package as well, but you won't hear about those until later.)
With all that said, I've got a lot of knitting ahead of me for the fall! :)
Saturday, August 21, 2010
Friday, August 20, 2010
Little Things
The last couple days I've been working on items for my swap partner in the Teddy Bear Picnic Swap. I was cruising right along on one of the patterns when I realized I wouldn't have enough yarn for the project. Who knows why it happened, but when I ordered the yarn for this project, I completely forgot to check the yardage I needed. Must have been a spacey day! I ordered more yarn the other day, and thought about waiting (and possibly ripping back) so I could alternate skeins for consistent colors, but I'm not patient enough for that, apparently. I went ahead and knit as much as I could with the first skein. Some may find it a bit daring to be so confident that dye lots will match well enough. I think perhaps I'm maybe just foolish for not waiting! lol
Anyway, this project is super simple. Really what I needed after all that shower knitting - something mindless. I found, though, that I was getting bored with it pretty fast. I think I've finally moved past that point as a beginning knitter where anything (even plain old St. st) seems fun & exciting to knit. Now I like to have a little something, even increases or decreases, to keep me interested. But since I don't have the 2nd skein yet, it's all okay, because in the meantime I've picked up some other projects.
I did some more swap knitting last night. Although I can't reveal the details, I will say that these little buggers are quick! I had a couple knit in a couple hours. And I love how they turned out. The color yarn I used really fits the project well and seems just right. I even was able to do some stash-busting on this one!
One of the next things I'll be working on will be ID clip adornments for my mom. She has a few picked out and they are small, so they should be quick. After those are complete, there will be some major shawl knitting. Mom's shawl really needs to get finished. And I just have to remember that it takes a little concentration but in all honesty, shouldn't take as long as it is.
With all that said, I think I've decided to expand a little into sock weight yarn on my Etsy shop. I got a huge response from all you readers saying you'd like to see sock yarn. So I guess it's time I give it a try. It won't be immediate, but look for that in the future. Until then, don't forget I do have some worsted weight yarn in the shop and soon I'll be adding some yarn very similar to the yarn dyed for my sister's Market Bag.
Anyway, this project is super simple. Really what I needed after all that shower knitting - something mindless. I found, though, that I was getting bored with it pretty fast. I think I've finally moved past that point as a beginning knitter where anything (even plain old St. st) seems fun & exciting to knit. Now I like to have a little something, even increases or decreases, to keep me interested. But since I don't have the 2nd skein yet, it's all okay, because in the meantime I've picked up some other projects.
I did some more swap knitting last night. Although I can't reveal the details, I will say that these little buggers are quick! I had a couple knit in a couple hours. And I love how they turned out. The color yarn I used really fits the project well and seems just right. I even was able to do some stash-busting on this one!
One of the next things I'll be working on will be ID clip adornments for my mom. She has a few picked out and they are small, so they should be quick. After those are complete, there will be some major shawl knitting. Mom's shawl really needs to get finished. And I just have to remember that it takes a little concentration but in all honesty, shouldn't take as long as it is.
One of my next projects, I think, is going to be making a light box.
Melissa, over at Knitting a Baby, has a new light box her and her husband made. It works so well for taking pictures with a clean, seamless background. I'd love to have that for smaller items. Especially for those rainy days or late nights after I've finished a project....I wouldn't have to wait for nice, bright weather to go outside. If you'd like to know how to make your own light box, here are a couple tutorials of homemade light boxes (cardboard box, PVC pipe).With all that said, I think I've decided to expand a little into sock weight yarn on my Etsy shop. I got a huge response from all you readers saying you'd like to see sock yarn. So I guess it's time I give it a try. It won't be immediate, but look for that in the future. Until then, don't forget I do have some worsted weight yarn in the shop and soon I'll be adding some yarn very similar to the yarn dyed for my sister's Market Bag.
Monday, August 16, 2010
Warning: Picture Overload!
Since today was the deadline for most of my recent knitting, I can finally share all my projects! I've been aiming to get a "gift set" of knit items done for a friend's baby shower. Since I found out she was expecting, I've looked over so many patterns it's not even funny. I finally settled on a few I thought I could complete in the given amount of time.
So I have 5 projects to share with you. I could share them one at a time, but I'm not that patient. And since they're all sort of a set, it didn't seam right to separate them. First off, the basics. All items were made from Tahki Cotton Classic and Tahki Cotton Classic Lite yarn (exception: butterfly on the frog clip is KnitPicks Wool of the Andes Yarn in Rose Petal - great use of some yarn remnants!).
The color scheme sprang from a few different things. First, L & J are having a boy. So, pinks and purples, etc. were ruled out. I also decided to find out what preferences L had - some people don't like the traditional "blue for boy, pink for girl" color scheme. She had told me she liked brown, combined with other colors. Then I found out the nursery was painted brown & green and her cousin gave me more specifics on the colors (yellow-green, not blue-green). With all that in mind, I knew I would use brown and a few shades of green. But I was also really starting to like blue, green and brown together. So there's a little blue thrown in here in there (rattle, elephant clip & baby sack).
So now for a few pictures. I started with the Toadstool Baby Rattle. This pattern was so amazingly simple and quick. And I love that it's a cat toy used inside as the rattle (I don't know why this makes me smile).
The pattern gave several examples and suggestions of ways to knit the colors on this toadstool - obviously I opted for less realistic and more just fun.
This toy should be very baby friendly since the "stem" is fairly small and squishy. (I love the way the bottom of the stem is just blue.)
As is the cap. Nice and plush for a babe to grab on to and goober on. :)
Second and third are pacifier clips. I've made the elephant paci clip 3 times now. I can't say enough good things about this pattern. So quick it can be completed in a matter of hours.
Yes, the ears are crocheted, not knit. This is probably my favorite of the 3 binky clips in Itty Bitty Nursery. Maybe cause elephant baby stuff is cute (but then again what baby item isn't?). And it's awesome that his trunk is the strap. :)
The frog clip was a bit of a challenge. A little project with lots of tiny, tiny pieces.
First off, every piece of the frog you see is a separate piece. So 2 eyes, 1 head, 1 body, 2 legs, 2 arms, 2 hands, 2 feet.
Then you have the leaves, and the butterfly, and the stem, and the strap...well you get the idea. LOTS of pieces.
In the end, though, it's worth all the work (as are most projects). As I was knitting, I thought to myself, I'll never knit this again, dang little pieces. Then I finished and though, "This is worth doing again." Funny how quickly you can change your mind when you see it all together. Doesn't make me loathe the work any less... And how fitting it's a frog since Baby's nickname is "Tadpole." :)
Fourth, a baby sack. This is similar to the sleepers or gowns w/ the elastic bottoms that keep baby's feet warm or catch socks when they fall off.
This is my favorite of everything gifted. I chose to use all 6 colors (3 greens, 2 blues, 1 brown) in the striping and I couldn't be happier.
It seems REALLY long, but I had to make sure it wouldn't be shorter than the baby.
At the suggestion of a friend, I shifted the beginning of each round to the side so that the jogless jogs would be far less noticeable. It works beautifully.
I also chose to sew on snaps instead of create buttonholes because I wanted this to be an easy garment to use. I then sewed some buttons on the top for decoration. Deceptively simple. :)
The bottoms gets cinched shut like a drawstring bag, and tied in a bow. I chose to use I-cord instead of store-bought cord or ribbon, it gives it a good weight to the bottom. This could also be left open if L or J prefers. And if ever used when traveling, pants would easily fit underneath so the sack can be pulled up to accommodate the carseat straps.
I knit the sleeves flat and then sewed them shut on my sewing machine instead of knitting them shut. It seemed too messy and loose with just knitting it. This was another good suggestion from the aforementioned friend! (Thanks, Melissa!)
Just a quick note on this pattern - it gives lots of flexibility on the little details to personalize it for a girl or boy. And because I was knitting w/ a DK weight yarn and not worsted, I did the math and cast on extra stitches. I hope it fits!! I chose to knit the cuffs, collar, and bottom edge in 2x2 ribbing for a sporty look. I also omitted the stitches written into the pattern for the button placket. Instead I picked up stitches and knit 6 rows of 1x1 ribbing on each side.
And finally, I knit a baby blanket using the Honeycomb Stroller Blanket pattern. This pattern suggests US size 10 needles with DK yarn. I used US 9 needles and cast on 132 instead of 100 stitches, making it a little wider.
This pattern is also simple, although it looks a little complicated. It's not at all. I won't go into knitty, gritty details, but essentially it's just a lot of knit and purl rows, no stranding or anything!
The border/edging was a pain in my bottom but I got it done. The worst part was picking up the stitches on each edge (I picked up about 500 stitches total - that's a lot!).
Although this isn't a big blanket (only 27" x 32"), it should make for a great baby/carseat/stroller blanket.
What's interesting is that this blanket is not reversible. You can certainly tell front from back. I do love it though and I'm happy to see it all done. I worked triple-time this week to get this blanket done and blocked by this morning!
So that's the "gift set." I'm pleased with myself, I love how it all came together. Hopefully L & J find each item useful and fun. It's not your typical baby boy colors. Bold, vibrant, rich. And best of all for a new mom & dad - it's all machine washable!
So I have 5 projects to share with you. I could share them one at a time, but I'm not that patient. And since they're all sort of a set, it didn't seam right to separate them. First off, the basics. All items were made from Tahki Cotton Classic and Tahki Cotton Classic Lite yarn (exception: butterfly on the frog clip is KnitPicks Wool of the Andes Yarn in Rose Petal - great use of some yarn remnants!).
The color scheme sprang from a few different things. First, L & J are having a boy. So, pinks and purples, etc. were ruled out. I also decided to find out what preferences L had - some people don't like the traditional "blue for boy, pink for girl" color scheme. She had told me she liked brown, combined with other colors. Then I found out the nursery was painted brown & green and her cousin gave me more specifics on the colors (yellow-green, not blue-green). With all that in mind, I knew I would use brown and a few shades of green. But I was also really starting to like blue, green and brown together. So there's a little blue thrown in here in there (rattle, elephant clip & baby sack).
So now for a few pictures. I started with the Toadstool Baby Rattle. This pattern was so amazingly simple and quick. And I love that it's a cat toy used inside as the rattle (I don't know why this makes me smile).
The pattern gave several examples and suggestions of ways to knit the colors on this toadstool - obviously I opted for less realistic and more just fun.
This toy should be very baby friendly since the "stem" is fairly small and squishy. (I love the way the bottom of the stem is just blue.)
As is the cap. Nice and plush for a babe to grab on to and goober on. :)
Second and third are pacifier clips. I've made the elephant paci clip 3 times now. I can't say enough good things about this pattern. So quick it can be completed in a matter of hours.
Yes, the ears are crocheted, not knit. This is probably my favorite of the 3 binky clips in Itty Bitty Nursery. Maybe cause elephant baby stuff is cute (but then again what baby item isn't?). And it's awesome that his trunk is the strap. :)
First off, every piece of the frog you see is a separate piece. So 2 eyes, 1 head, 1 body, 2 legs, 2 arms, 2 hands, 2 feet.
Then you have the leaves, and the butterfly, and the stem, and the strap...well you get the idea. LOTS of pieces.
In the end, though, it's worth all the work (as are most projects). As I was knitting, I thought to myself, I'll never knit this again, dang little pieces. Then I finished and though, "This is worth doing again." Funny how quickly you can change your mind when you see it all together. Doesn't make me loathe the work any less... And how fitting it's a frog since Baby's nickname is "Tadpole." :)
Fourth, a baby sack. This is similar to the sleepers or gowns w/ the elastic bottoms that keep baby's feet warm or catch socks when they fall off.
This is my favorite of everything gifted. I chose to use all 6 colors (3 greens, 2 blues, 1 brown) in the striping and I couldn't be happier.
It seems REALLY long, but I had to make sure it wouldn't be shorter than the baby.
At the suggestion of a friend, I shifted the beginning of each round to the side so that the jogless jogs would be far less noticeable. It works beautifully.
I also chose to sew on snaps instead of create buttonholes because I wanted this to be an easy garment to use. I then sewed some buttons on the top for decoration. Deceptively simple. :)
Just a quick note on this pattern - it gives lots of flexibility on the little details to personalize it for a girl or boy. And because I was knitting w/ a DK weight yarn and not worsted, I did the math and cast on extra stitches. I hope it fits!! I chose to knit the cuffs, collar, and bottom edge in 2x2 ribbing for a sporty look. I also omitted the stitches written into the pattern for the button placket. Instead I picked up stitches and knit 6 rows of 1x1 ribbing on each side.
And finally, I knit a baby blanket using the Honeycomb Stroller Blanket pattern. This pattern suggests US size 10 needles with DK yarn. I used US 9 needles and cast on 132 instead of 100 stitches, making it a little wider.
This pattern is also simple, although it looks a little complicated. It's not at all. I won't go into knitty, gritty details, but essentially it's just a lot of knit and purl rows, no stranding or anything!
What's interesting is that this blanket is not reversible. You can certainly tell front from back. I do love it though and I'm happy to see it all done. I worked triple-time this week to get this blanket done and blocked by this morning!
So that's the "gift set." I'm pleased with myself, I love how it all came together. Hopefully L & J find each item useful and fun. It's not your typical baby boy colors. Bold, vibrant, rich. And best of all for a new mom & dad - it's all machine washable!
Tuesday, August 10, 2010
I have been busy busy busy knitting away on some gifts. I'm pretty proud of myself for the amount that I've accomplished in such a short time, and of course, I'm dying to share pictures and tell you all about them. If you're on Ravelry, you've seen a few of my projects, although there are a few I can't share there either. :\
One of my next projects will be little. My mom works at a school, and like many other schools, teachers and staff all have ID tags that they wear throughout the day. A few years back I made her a few jeweled lanyards to wear her tags on, but she's looking for something new and a little spiffier. I may incorporate a few of the binky clips into a ID clip design. Obviously, she won't be using a pacifier clip to hold it on, but we think we've got something worked out. I've also got a few flower patterns that I'll be picking from to make a few of these as well. I will share my progress as I go along - I'll have to get creative in attaching them, but I think I can work something out!
I have a few sewing projects I'd like to get back to. There are a couple quilts I'd really like to start - namely the I-Spy quilt for X. He's very much at the age where pointing and naming and talking about things is FUN! I have to remind myself, though, that when I'm ready to tackle this project, it's okay if I choose to do little bits at a time, and work on other projects in-between. I have a tendency when sewing to start and finish a project before moving on to another one. While this keeps me organized and less likely set projects aside for extended periods of time, I will admit that sometimes I get bored with just one project and feel the need to move on to something else. I don't have any qualms with having several knit projects on the needles, so why do I feel guilty about the sewing? Maybe because in sewing, I like to have everything spread out in front of me where I can see it all. And then I leave it in a relatively messy state until said project is finished.
The other thing I'd LOVE to finish in the next couple weeks is a laptop sleeve for my school computer. I have the pattern, I'm sure I've got some fabric that I want to use (need to stash dive before I buy anymore!), now I just need to kick myself into gear (what's that Nike motto? Just Do It!). For those of you who have laptops, and use some type of laptop sleeve, what do you do with all the cords? My purposes for the sleeve are so I can carry my computer in my schoolbag and not lug around the laptop case. Should I create an extra pocket on the front/top to accommodate a mouse and power cord? Or just settle with throwing it in the bag, not worrying about it being in the sleeve?
It's a gloomy, humid, rainy day here. Hopefully, this makes for good crafting weather! :)
One of my next projects will be little. My mom works at a school, and like many other schools, teachers and staff all have ID tags that they wear throughout the day. A few years back I made her a few jeweled lanyards to wear her tags on, but she's looking for something new and a little spiffier. I may incorporate a few of the binky clips into a ID clip design. Obviously, she won't be using a pacifier clip to hold it on, but we think we've got something worked out. I've also got a few flower patterns that I'll be picking from to make a few of these as well. I will share my progress as I go along - I'll have to get creative in attaching them, but I think I can work something out!
I have a few sewing projects I'd like to get back to. There are a couple quilts I'd really like to start - namely the I-Spy quilt for X. He's very much at the age where pointing and naming and talking about things is FUN! I have to remind myself, though, that when I'm ready to tackle this project, it's okay if I choose to do little bits at a time, and work on other projects in-between. I have a tendency when sewing to start and finish a project before moving on to another one. While this keeps me organized and less likely set projects aside for extended periods of time, I will admit that sometimes I get bored with just one project and feel the need to move on to something else. I don't have any qualms with having several knit projects on the needles, so why do I feel guilty about the sewing? Maybe because in sewing, I like to have everything spread out in front of me where I can see it all. And then I leave it in a relatively messy state until said project is finished.
The other thing I'd LOVE to finish in the next couple weeks is a laptop sleeve for my school computer. I have the pattern, I'm sure I've got some fabric that I want to use (need to stash dive before I buy anymore!), now I just need to kick myself into gear (what's that Nike motto? Just Do It!). For those of you who have laptops, and use some type of laptop sleeve, what do you do with all the cords? My purposes for the sleeve are so I can carry my computer in my schoolbag and not lug around the laptop case. Should I create an extra pocket on the front/top to accommodate a mouse and power cord? Or just settle with throwing it in the bag, not worrying about it being in the sleeve?
It's a gloomy, humid, rainy day here. Hopefully, this makes for good crafting weather! :)
Monday, August 9, 2010
Itty Bitty Teddy Bear Picnic Swap
Wow, now that's a mouthful of a title!
The most recent swap I've been participating in is the Teddy Bear Picnic Swap on the Itty Bitty forums. This swap consists of 3 different packages, each sent a month apart. Our first package was due to be sent by August 4th. I thought this one would easily be out the door early on in the game...but with everything so busy getting other things around (both knit and sewn), I ended up sending it out the day before the deadline. I have heard that my swap pal has received her package. I hope she likes everything.
So for the rules - there are several elements to this swap. When all is said and done, each participant should have everything they need for a teddy bear picnic. Which requires several things such as a tea set/dishes, a picnic blanket, play food, a teddy bear, and real yummies. And then of course any other goodies you feel the need to include.
The first package of the swap required us to send a "knit kit" to our partner so that she would have everything necessary to knit 1 element (i.e., the tea set, the teddy bear, the play food, the blanket, etc.). So any yarn, pattern, stuffing, polypellets, needles, and the like should be included unless your partner says otherwise. Although you do not have to send a kit that's an "Itty Bitty" or "Susan" pattern, you must use at least 1 Itty Bitty knit by the time all is said and done (that's what makes it an itty bitty swap!).
The second package is another element of the swap - if you sent a kit to knit the teddy bear on the first go around, then you could send a handmade picnic quilt. Or you could send a knit food. There are endless options on how you can orchestrate your packages. (Side note - you don't have to knit everything. We are given the option to knit, sew, or purchase any of the elements - no restrictions.)
The final package includes the remaining elements. So if I sent a kit for a knit teddy bear and then sent a quilted blanket, my remaining package would could include some play food, a china tea set, and some homemade banana bread and cookies. Like I said, lots of options here!
Although I'm not going to share yet what I sent to my swap partner, I am going to share what I have received! :) I arrived home from a weekend away yesterday to find a package waiting for me. I knew exactly what it was for!
After unpacking and getting X settled in with some juice and his toys, I opened it all up. :) I had a good time enjoying the spread of items.
Everything was boxed up in a lovely decorative photo box with flowers and summery colors. She also included a little Winnie the Pooh Bear card - I love Pooh Bear. :)
There was also a beautiful skein of Dream in Color Smooshy sock yarn for me to try (on my wish list to knit some day) in a wonderful blue colorway.
My swap pal also included a little bath toy for X - so thoughtful and I appreciate her thinking of him so much! It's a little turtle-shaped book with fun animals and colors.
As for my kit, she did not disappoint! My swap pal got to work on her sewing machine and made me a lovely blue and green paisley project bag, which I adore. How did she know I love paisley so much! And project bags are the best - you can never have too many. :)
She sent the yarn for the knitted Finger Foods from Itty Bitty Toys. I've been wanting to knit these for a while, this will be a great opportunity to do so. The yarn is Cascade Yarns Fixation in several wonderful colors, along with a brown skein of Universal Yarn Pace.
And even better, I'll get to knit the food on my brand new Nickel-Plated KnitPicks dpns! I love KnitPicks needles - it's my every intention to have a full set of Harmony & Nickel-Plated Options needles and dpns. :) There was also a pretty notebook to help me keep track of my projects while I work on them.
So to my dear swap partner - thank you, thank you, thank you! I love it all and couldn't wait to take pictures yesterday! :)
The most recent swap I've been participating in is the Teddy Bear Picnic Swap on the Itty Bitty forums. This swap consists of 3 different packages, each sent a month apart. Our first package was due to be sent by August 4th. I thought this one would easily be out the door early on in the game...but with everything so busy getting other things around (both knit and sewn), I ended up sending it out the day before the deadline. I have heard that my swap pal has received her package. I hope she likes everything.
So for the rules - there are several elements to this swap. When all is said and done, each participant should have everything they need for a teddy bear picnic. Which requires several things such as a tea set/dishes, a picnic blanket, play food, a teddy bear, and real yummies. And then of course any other goodies you feel the need to include.
The first package of the swap required us to send a "knit kit" to our partner so that she would have everything necessary to knit 1 element (i.e., the tea set, the teddy bear, the play food, the blanket, etc.). So any yarn, pattern, stuffing, polypellets, needles, and the like should be included unless your partner says otherwise. Although you do not have to send a kit that's an "Itty Bitty" or "Susan" pattern, you must use at least 1 Itty Bitty knit by the time all is said and done (that's what makes it an itty bitty swap!).
The second package is another element of the swap - if you sent a kit to knit the teddy bear on the first go around, then you could send a handmade picnic quilt. Or you could send a knit food. There are endless options on how you can orchestrate your packages. (Side note - you don't have to knit everything. We are given the option to knit, sew, or purchase any of the elements - no restrictions.)
The final package includes the remaining elements. So if I sent a kit for a knit teddy bear and then sent a quilted blanket, my remaining package would could include some play food, a china tea set, and some homemade banana bread and cookies. Like I said, lots of options here!
Although I'm not going to share yet what I sent to my swap partner, I am going to share what I have received! :) I arrived home from a weekend away yesterday to find a package waiting for me. I knew exactly what it was for!
After unpacking and getting X settled in with some juice and his toys, I opened it all up. :) I had a good time enjoying the spread of items.
Everything was boxed up in a lovely decorative photo box with flowers and summery colors. She also included a little Winnie the Pooh Bear card - I love Pooh Bear. :)
There was also a beautiful skein of Dream in Color Smooshy sock yarn for me to try (on my wish list to knit some day) in a wonderful blue colorway.
My swap pal also included a little bath toy for X - so thoughtful and I appreciate her thinking of him so much! It's a little turtle-shaped book with fun animals and colors.
As for my kit, she did not disappoint! My swap pal got to work on her sewing machine and made me a lovely blue and green paisley project bag, which I adore. How did she know I love paisley so much! And project bags are the best - you can never have too many. :)
She sent the yarn for the knitted Finger Foods from Itty Bitty Toys. I've been wanting to knit these for a while, this will be a great opportunity to do so. The yarn is Cascade Yarns Fixation in several wonderful colors, along with a brown skein of Universal Yarn Pace.
And even better, I'll get to knit the food on my brand new Nickel-Plated KnitPicks dpns! I love KnitPicks needles - it's my every intention to have a full set of Harmony & Nickel-Plated Options needles and dpns. :) There was also a pretty notebook to help me keep track of my projects while I work on them.
So to my dear swap partner - thank you, thank you, thank you! I love it all and couldn't wait to take pictures yesterday! :)
Tuesday, August 3, 2010
Demo Derby & Flouncy Bag
So it's a Friday night in America's hometown, the County Fair is upon us. And where do X and I find ourselves?
This year we sat a bit low in the bleachers - 4 or 5 rows up. Usually we're at least 2-3 rows higher. Now, everyone is relatively close to the "field" (probably more accurately called a "ring") because let's face it - this is a small town county fair. But there are a few dangers to sitting so low and close. And that evening was no exception. For those of you who are not up to speed with what happens at a demolition derby, let me inform you on a few pieces.

There are several rounds, each a different "class" that is competing. The cars all line up, rev their engines, wave to the crowd. Then the flag is dropped and they go to town, crashing and banging into one another with as much force as possible. Each car has a red flag attached to signal you're still in the game. You're disqualified if you intentionally strike the driver's side door (for safety reasons - we don't want anyone to get hurt!). You are also required to break your flag if your car stalls and you can't get it restarted in a pre-determined amount of time. Also, if you get stuck in the mud or on the logs surrounding the ring, you're out (for the obvious reason that you can no longer move - and it's not safe for other cars to try and push them out of the ring further).
The ring/track/field is just dirt. But....if it's especially dry then someone goes out to water that dirt, which all of us know makes mud. The mud makes it more fun - more slick - more mess. But it also means that if a car really spins it's tires, and the car is facing away from the stands, and that mud starts flinging.....guess where it lands? Yes, you guessed it - right into our laps! Or at our heads, or knees, or feet. But no worries - it's still fun.
X had a blast! He couldn't stop pointing and exclaiming at those loud cars! He loved the noise and the crashing and just the entire process. I'm so glad I took him. He's such a boy. (Although, I will admit, I probably enjoyed it as much as he did.)
And by the time X and I left for home, it had drastically cooled off. A storm was rolling in and the clouds blocked out that hot, hot sun. A nice breeze came through and it became an enjoyable evening - a break in the humidity. :)
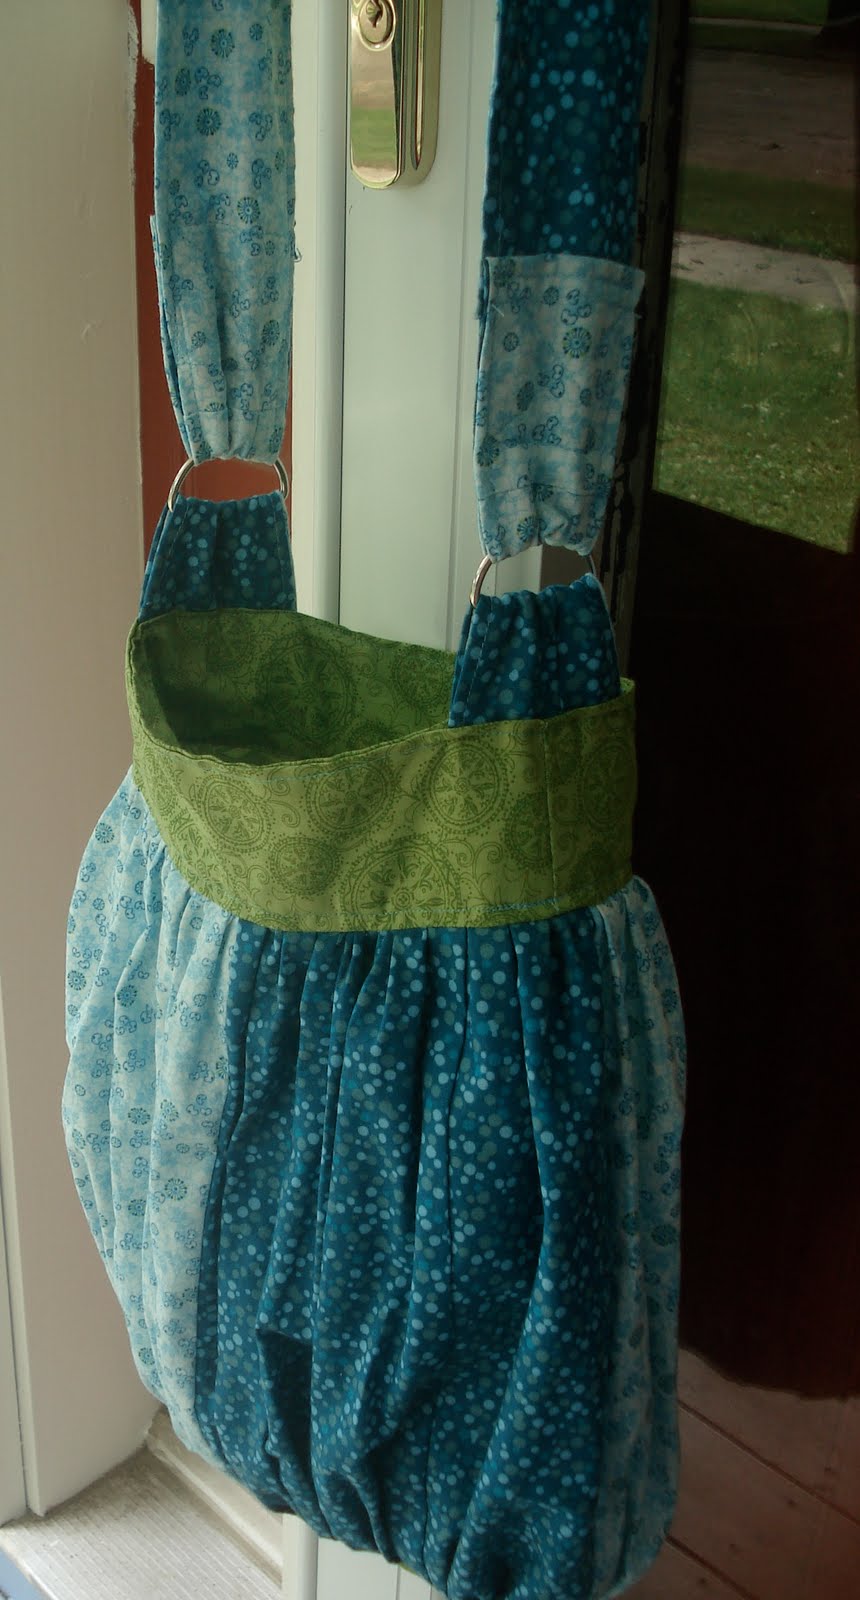
I was also able to use this night as an opportunity to test out a new bag I made. The pattern is the Flouncy Bag from One Yard Wonders by Rebecca Yaker & Patricia Hoskins. I made it with the intention of using it as a project bag for my knitting, but thought I may want to use it for other things every now and then. I love how the bag turned out, but I will stick with it for it's intended purpose.
I used leftover fabric from my personal KnitBook to make all the pieces. I omitted the ribbon embellishment on the strap and the ribbon pockets on the inside.
The outside of the bag is gathered at the top and bottom (and now I not only know how to gather, but I've gotten a few tips from Mom on how to do it better, as well as how to sew better curves - thanks Mom!!). This gives it a nice "pouffy" feeling/look.

The lining is not gathered, just straight 9" panels attached to an oval bottom. If I were to make this bag again, I'd make the lining bigger. There is no give to the inside and you can store very little. I wouldn't like this bag as a purse or an out-and-about bag because I'd have no room. Along with making it bigger, I might even consider gathering the lining to give it that great ease.

My hopes with that redesign is that it would also give the outside more shape and play up the gathers. Very easy, cute bag, though. I love it for my knitting - it stores everything I need pretty well. :)
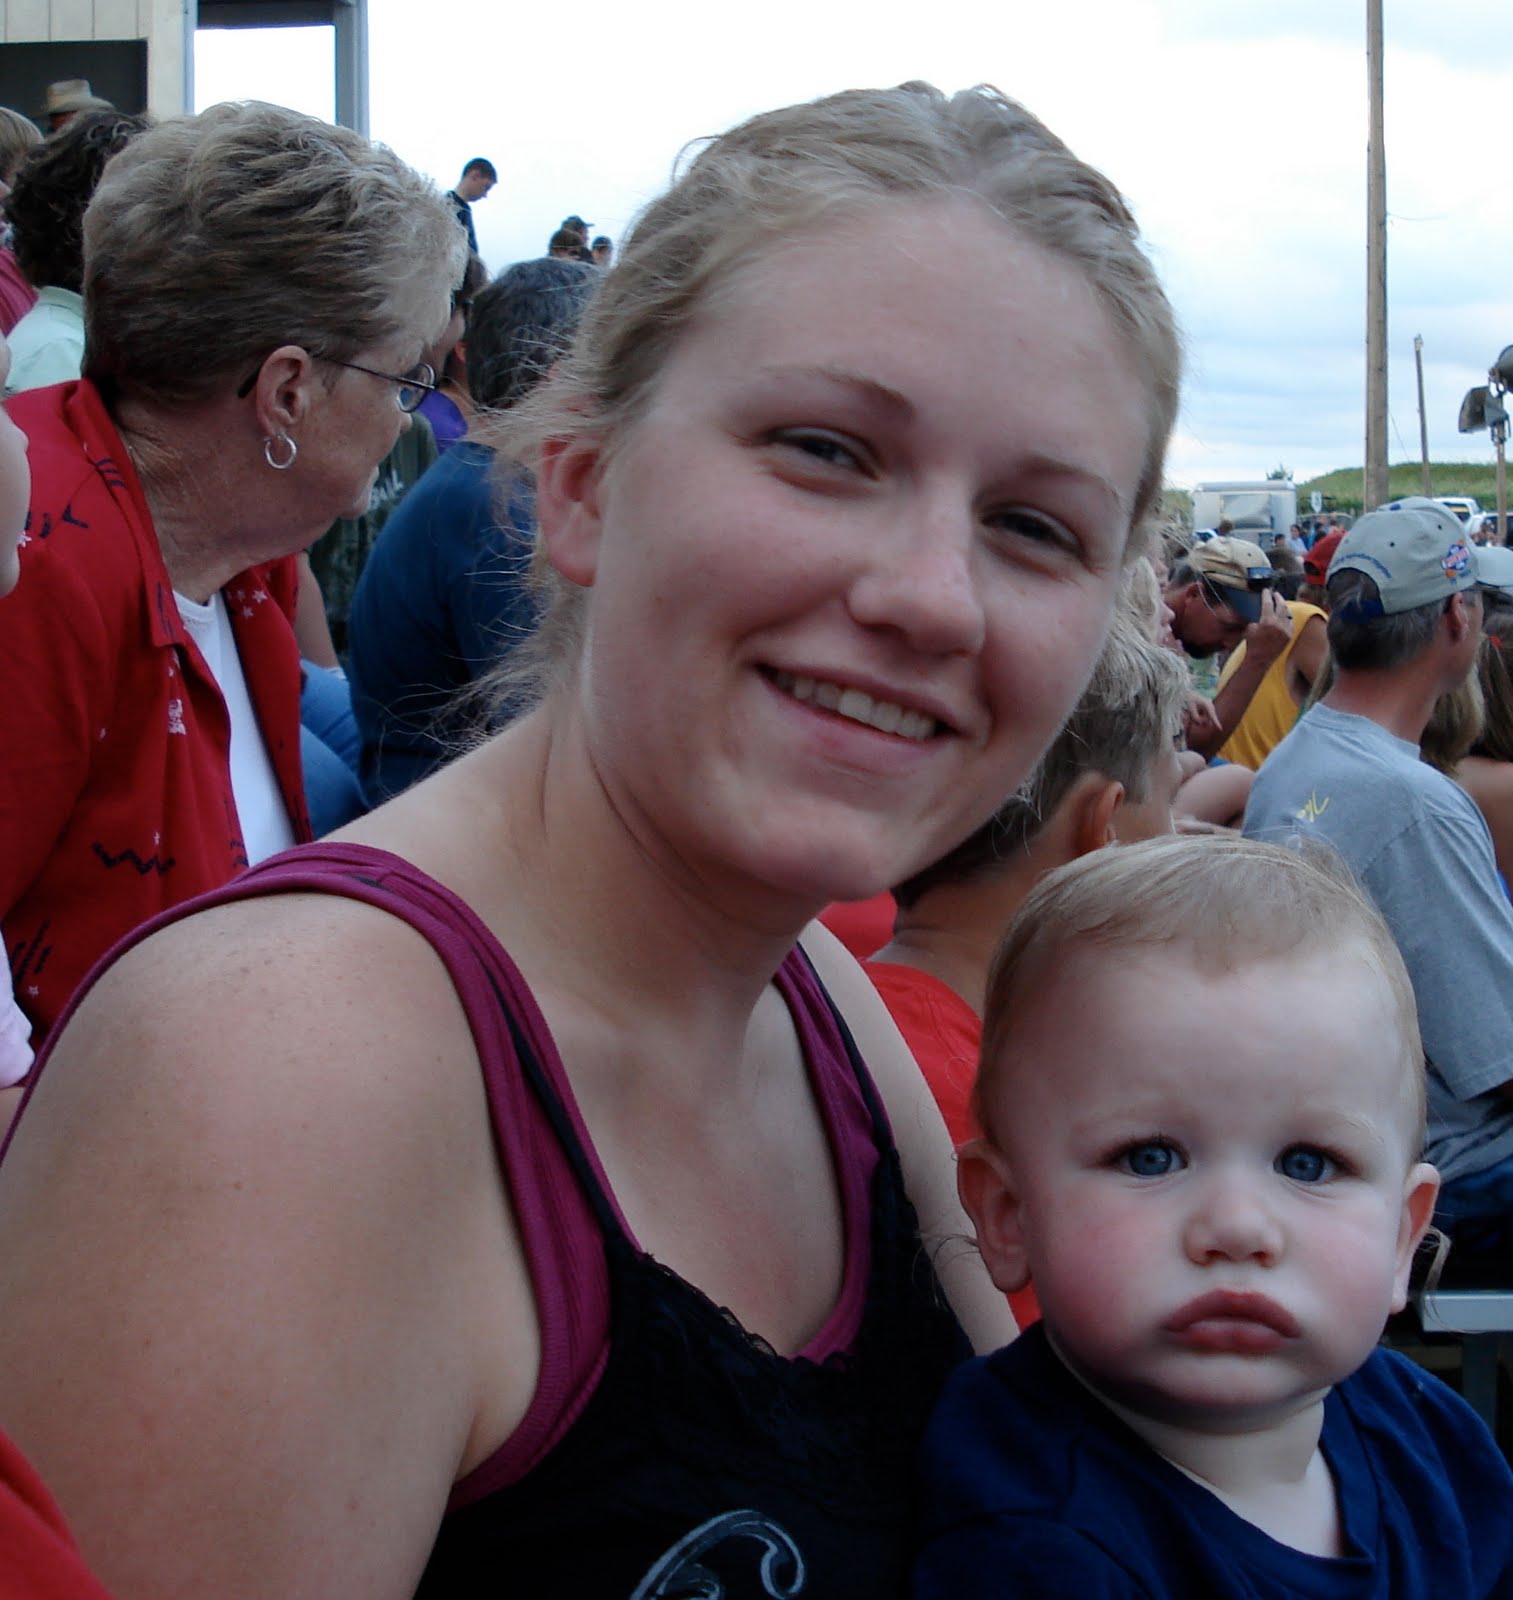
Aunt C & X
That's right. At the Demolition Derby! I don't know how many of you, Readers, have ever been to a Demo Derby, but it's a lot of noise and crashing and mud flying and fun! I've been attending Demo Derby's for a long time and they always amuse me. And yes, I chose to take time away from knitting or sewing or crafting at home to go out in the hot, humid July weather to see these people crash into one another. In my opinion, one of the best ways to spend a Friday night in the summertime. :)There are several rounds, each a different "class" that is competing. The cars all line up, rev their engines, wave to the crowd. Then the flag is dropped and they go to town, crashing and banging into one another with as much force as possible. Each car has a red flag attached to signal you're still in the game. You're disqualified if you intentionally strike the driver's side door (for safety reasons - we don't want anyone to get hurt!). You are also required to break your flag if your car stalls and you can't get it restarted in a pre-determined amount of time. Also, if you get stuck in the mud or on the logs surrounding the ring, you're out (for the obvious reason that you can no longer move - and it's not safe for other cars to try and push them out of the ring further).
The ring/track/field is just dirt. But....if it's especially dry then someone goes out to water that dirt, which all of us know makes mud. The mud makes it more fun - more slick - more mess. But it also means that if a car really spins it's tires, and the car is facing away from the stands, and that mud starts flinging.....guess where it lands? Yes, you guessed it - right into our laps! Or at our heads, or knees, or feet. But no worries - it's still fun.
X had a blast! He couldn't stop pointing and exclaiming at those loud cars! He loved the noise and the crashing and just the entire process. I'm so glad I took him. He's such a boy. (Although, I will admit, I probably enjoyed it as much as he did.)
Enamored.
One driver did get hurt, but wasn't seriously injured. Although he was carried off, he was able to wave to crowd as he went by. And by the time X and I left for home, it had drastically cooled off. A storm was rolling in and the clouds blocked out that hot, hot sun. A nice breeze came through and it became an enjoyable evening - a break in the humidity. :)
I was also able to use this night as an opportunity to test out a new bag I made. The pattern is the Flouncy Bag from One Yard Wonders by Rebecca Yaker & Patricia Hoskins. I made it with the intention of using it as a project bag for my knitting, but thought I may want to use it for other things every now and then. I love how the bag turned out, but I will stick with it for it's intended purpose.
I used leftover fabric from my personal KnitBook to make all the pieces. I omitted the ribbon embellishment on the strap and the ribbon pockets on the inside.
The outside of the bag is gathered at the top and bottom (and now I not only know how to gather, but I've gotten a few tips from Mom on how to do it better, as well as how to sew better curves - thanks Mom!!). This gives it a nice "pouffy" feeling/look.
The lining is not gathered, just straight 9" panels attached to an oval bottom. If I were to make this bag again, I'd make the lining bigger. There is no give to the inside and you can store very little. I wouldn't like this bag as a purse or an out-and-about bag because I'd have no room. Along with making it bigger, I might even consider gathering the lining to give it that great ease.
My hopes with that redesign is that it would also give the outside more shape and play up the gathers. Very easy, cute bag, though. I love it for my knitting - it stores everything I need pretty well. :)
Monday, August 2, 2010
Shhh...It's a Secret!
Well, I'd love to share some new photos with you of some newly knit items....but I can't. After I finished the Hippo, I cast on for a new project almost right away.
Since it's a gift for someone, who may read this blog, I can't divulge any great details other than I'm using Tahki Cotton Classic and Tahki Cotton Classic Lite yarn. First off, I do love this yarn! It's soft and silky and just runs through your fingers. I have noticed that if you literally knit all day with it, though, it tends to make your fingertips sore....lol (but I think in my case, that may be true of any yarn). What I especially love about this yarn is that there are so many colors to choose from! It made this project much easier by that fact alone. One downside, though, is that it's a DK weight yarn. Now, there's nothing wrong with DK weight yarn, except that most patterns I knit call for worsted weight. So, with that in mind, I had to reconfigure some of the pattern to accommodate the lighter weight. With a lot of things, the yarn weight isn't important, but in this case, gauge is very important!
Anyway, I have been dragging my feet on starting this project. I didn't have a completely clear picture in my mind of how this project would knit up. Most times I can just briefly look over a pattern and dive in. This time, I had to read and reread to make sure I was getting it right. Then, once I started, I realized my mistake in choosing DK yarn, and had to do something I rarely do when knitting, math!
But, now with the pattern modified and retyped (much easier this way), I'm on a roll. I've been knitting this for 2 days straight and I LOVE how it's turning out! I don't want to put it down. And now I'm on a super-easy section of the pattern and can do other things while knitting, like watching Netflix. :)
I also got some sewing this last week. I finished a project bag for a swap. Love how it turned out. Again, can't share any pictures because I don't want to spoil any surprises. But trust me when I say I have been steadily knitting and sewing away. :) And soon I'll get to my favorite part - sharing the pictures! :)
Since it's a gift for someone, who may read this blog, I can't divulge any great details other than I'm using Tahki Cotton Classic and Tahki Cotton Classic Lite yarn. First off, I do love this yarn! It's soft and silky and just runs through your fingers. I have noticed that if you literally knit all day with it, though, it tends to make your fingertips sore....lol (but I think in my case, that may be true of any yarn). What I especially love about this yarn is that there are so many colors to choose from! It made this project much easier by that fact alone. One downside, though, is that it's a DK weight yarn. Now, there's nothing wrong with DK weight yarn, except that most patterns I knit call for worsted weight. So, with that in mind, I had to reconfigure some of the pattern to accommodate the lighter weight. With a lot of things, the yarn weight isn't important, but in this case, gauge is very important!
Anyway, I have been dragging my feet on starting this project. I didn't have a completely clear picture in my mind of how this project would knit up. Most times I can just briefly look over a pattern and dive in. This time, I had to read and reread to make sure I was getting it right. Then, once I started, I realized my mistake in choosing DK yarn, and had to do something I rarely do when knitting, math!
But, now with the pattern modified and retyped (much easier this way), I'm on a roll. I've been knitting this for 2 days straight and I LOVE how it's turning out! I don't want to put it down. And now I'm on a super-easy section of the pattern and can do other things while knitting, like watching Netflix. :)
I also got some sewing this last week. I finished a project bag for a swap. Love how it turned out. Again, can't share any pictures because I don't want to spoil any surprises. But trust me when I say I have been steadily knitting and sewing away. :) And soon I'll get to my favorite part - sharing the pictures! :)
Subscribe to:
Posts (Atom)