Thursday, June 30, 2011

Coffee Beans and Baby Socks

Are you tired of seeing baby sweaters yet?  I hope not because I have another to show you.   

Although this isn’t a set, I’m calling it one because I knit them with the purpose of Lovebug wearing them together.    I’ve admired the Coffee Bean Cardigan for a long while.  It’s boy and girl appropriate and offers a lot of flexibility and variety when choosing a color scheme. 

We’ll start with the cardigan.  Lovebug’s Coffee Bean Cardigan is knit from Cascade 220 in Cordovan (a reddish-brown) and some hand-dyed yarn I dyed with my sister last summer called Raspberry Truffle. I didn’t intend to like the results as much as I do! 
The Raspberry Truffle is a variegated yarn that goes from light pink to dark pink, creams and peaches, to browns.  The colorwork is 2-row striping, continued throughout the entire sweater. 
For a girl, I don’t mind the open raglan increases, the eyelets that are created are pretty and feminine. If I were to do this for a boy I’d probably use kfb (knit front back) or M1L/M1R (make 1 left/make 1 right) to eliminate the eyelets at the increases.

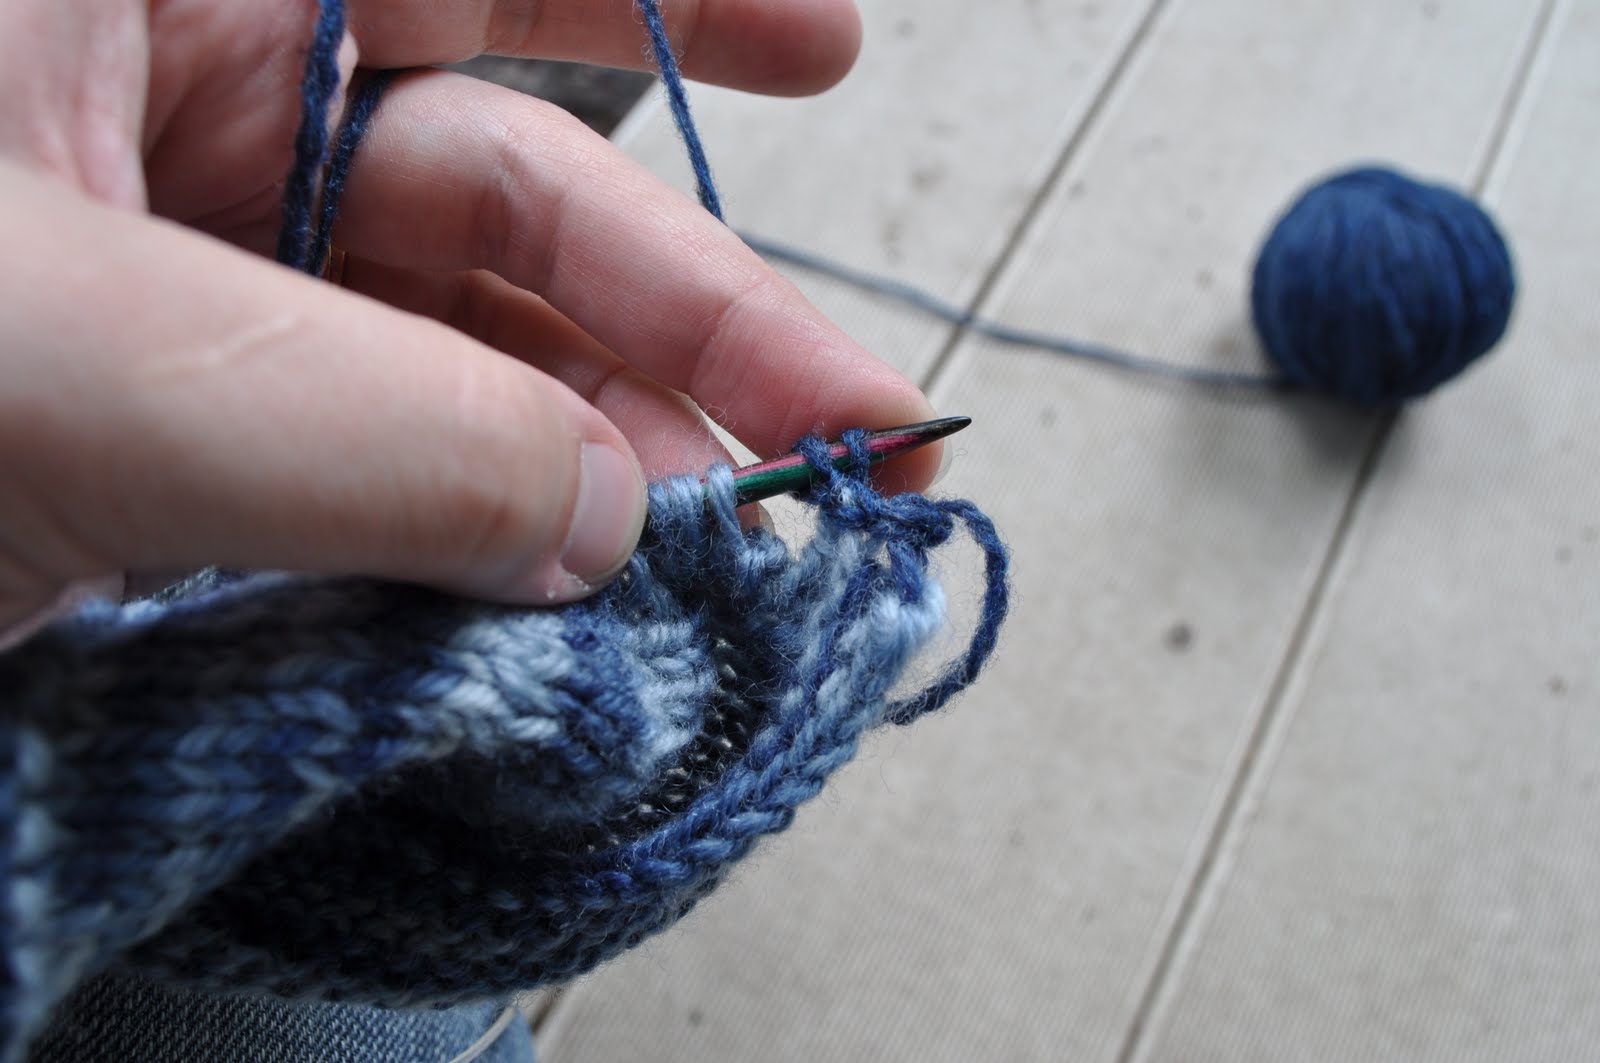
The first sleeve gave me some trouble.  I was having a hard time figuring out how to continue the stripping while carrying the yarn up the side, while knitting in the round.  The back and forth flat knitting of the body was no trouble at all, but I flubbed the sleeve just a bit.  The second sleeve went much better.  I could have ripped the first sleeve out to redo it, but I don’t think it’s that noticeable (at least not to a non-knitter). 

Watching the colors shift from one row to the next was my favorite part.  Because the variegated yarn was broken up by the brown stripes, I didn’t have to worry about any funny flashing or pooling and I could just enjoy the rich colors. 
And speaking of the colors, I chose more muted buttons this go-around.  The buttons are pink and black (or perhaps a very dark brown).  The pink has a bit of a shine to it which I like.  They are simple and understated and let the yarn do all the talking in this case. 
I then used the same Raspberry Truffle to make the Super Quick Baby Socks.  The name of this pattern is no lie, folks.  I had these socks completed in a day. It could have been an afternoon had I had the time to do them all at once.
I wish I had used the brown from the sweater for the edge of the cuff, the heel and the toe, but I’m not accustomed to knitting socks so it’s probably better I stuck with what I knew.   

They’re still unbelievably cute!
So now Lovebug has a cute little sweater and sock set to wear when she’s just a couple months old.  Perfect for the winter weather, where the splash of color will be much appreciated. 

Wednesday, June 29, 2011

Applied I-Cord: A Photo Tutorial

Recently, I knit a baby sweater that called for an applied i-cord edging around the front and neck.  I had a really difficult time understanding the written directions, so I went in search of a video tutorial on YouTube. I found a couple that were similar to what I was looking for, but nothing that explained the technique in the same way the pattern had it written.

Since nothing was exactly like what I wanted, I did a mash-up of THIS YouTube video, the written instructions, and my own ideas on what I wanted the edging to look like.

After reading through the project pages for the pattern, it seemed like a few people struggled with this technique, so I decided a photo tutorial might be helpful as well.  My technique is not the same as what was in the pattern, but I think the end result looks nice.

I hope these photos are helpful to some of you as well!

Let's get started!
There is a lot of knitting stitches onto the right-hand needle and then transferring them back to the left-hand needle.  It's fiddly, but it works.

It's helpful if you read through all the steps and look at all the photos at least once before you attempt to knit at the same time.  It may not make sense while reading it, but once you start knitting, it should become clearer.

1. First, slip all of the required stitches onto your designated circular needle.  
(You will only need 1 circular needle to do this technique.)

2.  Cast on the number of stitches instructed in the pattern onto the right-hand needle of the circular needle.  
(In the above picture, the needle resting in the middle of the sweater is the right-hand needle.)
(In my case, I needed to cast on 2 sts.)

3.  Move the cast on stitches from the right-hand needle onto the left-hand needle. 

4. Knit the first stitch on the left-hand needle.  

5. Slip the 2nd stitch as if to knit. 
(You now have 2 stitches on the right-hand needle.)

6.  Slip the 3rd stitch (which would be a picked up edge stitch) as if to purl.

7. There are now 3 sts on the right-hand needle.  (One knit stitch and 2 slipped stitches.)

8. Move the 2 slipped stitches back to the left-hand needle and knit them together through the back loop (you have now done a SSK). 

9.  You now have 2 completed stitches on your right-hand needle.  

10.  Move these 2 completed stitches back to the left-hand needle.  Wash, rinse, repeat. (In other words, you do steps 4-10 over and over again, until you either 1) reach a buttonhole or 2) have gone all the way around your project and are ready to bind off.)  Your next step here would be step 4, knit the first stitch. 

Applied I-Cord for Buttonholes
1. In my project, the cardigan calls for buttonholes along the applied i-cord.  To prepare for this, when picking up stitches, I skipped picking up one stitch because this is where the buttonhole would be placed.    At this point, you have done steps 4-10 of above until you reach your skipped stitch.  Do you see the 2 garter ridge bumps in the photo below?  Between those bumps is my skipped stitch.  

2. Now that you've identified buttonhole placement, place the two sts from the right-hand needle onto the left-hand needle.  (You've done this much lots of times before...just stick with me for a moment.)

3.  Now, instead of knitting the first stitch and slipping the 2nd stitch, you are going to knit 2 sts.  (So the 2 sts you just placed back on the left-hand needle will both be knit.  Do NOT knit them together, just k2.)

4.  Here are your two knit stitches on your right-hand needle.  

5.  Slip the two knit stitches back to the left-hand needle and continue as from the top with steps 4-10 (knit 1 st, slip 1 knitwise, slip 1 purlwise, k2tog tbl). 

6.  Do you see what this does at the buttonhole?  You have knit a portion of your i-cord as you would any normal i-cord, leaving a gap for the buttonhole, and kept your knitting from puckering.  Do you see my buttonhole in the photo below?

7.  From this point, you continue this technique over and over.  My pattern called for buttonholes every 4th stitch, so I have a total of 7 buttonholes.  Your item may not have any buttonholes.  Keep up the k1, s1 knitwise, s1 purlwise, k2tog tbl - move back to left-hand needle.  When you reach the end, bind off as you normally would any i-cord.  In the above linked video the woman uses an invisible cast-on and then does  a kitchner or 3-needle bind-off to pull it all together since she's going around a blanket edge. 

I hope this was helpful.  It still feels clumsy and complicated to me in just written and photographed form, so I plan to try getting a video tutorial added to this as well.  Until then, feel free to contact me  with any questions you may have regarding the tutorial and I'll do what I can to help.

Tuesday, June 28, 2011

Hello, Baby!

Before we knew we were having a girl, I was feeling a little lopsided in my knitting.  I had just barely finished the Beyond Puerperium cardigan when I cast on for the Hello Baby Cardigan by Susan B. Anderson.  Jill, on the Rav boards, mentioned she had started one and I was immediately seized with the desire to knit one myself.  For a boy.

Selecting a yarn was difficult because I wanted it to be obviously boy.  So instead of teals and blue-greens which I have a wonderful abundance of, I wanted a navy blue or brown.  I rediscovered some wool yarn - Universal Yarn Deluxe Worsted in Atlantic Blues - that I received in a swap in 2010 from Melissa.

I was feeling like my world was tipped back to balanced again and within just a couple days I had this little sweater all knit up.....well...mostly.
I will admit that I struggled...a lot....with the applied i-cord edging around the front and collar of this cute little sweater.  I picked up stitches about 5 times by the end, and watched several videos.  It never worked like I wanted it to.  After reading the project pages of other knitters, I found I wasn't the only one who had some trouble, but no one really explained how they ended up working themselves straight.  There were several people who mentioned they had no problems.  I think it was me and my ability to understand the pattern.
That being said, I decided to forge my own way.  Using the instructions from the pattern, THIS YouTube video, and my own understanding of the technique, I got it worked out, and I really like this edging.

I modified the pattern to include buttonholes all the way down the front, instead of just the 3 buttons at the top.  Since I was intending this to be for a boy, I thought buttons down the entire front would be better.
In the end, we found out we are having a girl (which I've yet to be shy about mentioning....I'm still so excited about it...).  Hmm....  This was for a boy.  I don't really know anyone with new baby boys, or anyone that knows they are having a boy.   At least not yet.  And since I'm not one to sit and wait and be patient, I decided this would be for a girl.  (It's easier to put a girl in navy blue than a boy in bright pink!)

So from there I found some girly buttons (actually, these buttons were discovered by Mr. Man....aren't they absolutely perfect for a baby girl?!  I love them and I'm super impressed with his button-finding skills).  Little sunflowers to bring some sunshine to what will be increasingly cold and gray weather.  I can really appreciate the bright yellow against the dark blues and grays of the yarn.  I did end up taking off the 4 bottom buttons so it's like the original pattern.  But I like the effect both ways.

At the suggestion of a friend, I opted to leave it at that.  I had considered some duplicate stitching, but I don't think it needs it.  Simple is good for little babies!
If you're interested in reading about my applied i-cord, I actually have written a photo tutorial of how I managed it.  The photos aren't great and I found it's hard to write what you actually mean...it's much easier to just show someone.  But I don't have a video.  Yet.  Check back tomorrow and it should be posted.  :)

You know what else I'm learning?  I'm learning that I thought being able to knit baby items would make me more patient and calm for the time little Lovebug would arrive.  Yeah....that's not quite accurate...  I'm actually finding that in some ways I'm MORE impatient for her to get here so I can see all these little things on her! :)

Monday, June 27, 2011

C Wants a Party

It may not be apparent to those of you who aren’t on Ravelry or don’t participate in the swaps, but the Itty Bitties are slowly making their way through alphabet themed swaps.  Even though the Easter Swap encompassed A, B & C, C was stubborn and wanted its own swap.  So here we are.

Requirements included the Cupcake Hat from Itty Bitty Nursery and the Cupcake Pincushion (a free pattern on Spud Says).  Also, of course, any other goodies you choose to include.

I had a lot of ideas for this swap, but in the end, I wasn’t able to do all I wanted.  I found this one to be a little harder since I had little energy to pull things together.  My swap package traveled to Maegwin, who is new to IB swaps.  Since I don’t know her as well as others, I’m really crossing my fingers she likes everything. 

I found stitch markers on Etsy I liked, but they would have had to ship from a long ways away and the shipping was expensive.  So I made my own – similar to what I saw.  I like these because they are small & lightweight.  Sometimes clay markers can be very heavy and weigh down your knitting.  Pinkish-red and what was meant to be mint green icing on chocolate cupcakes.  YUMM!
When perusing the goods at Hobby Lobby, I found a fantastic cupcake charm.  I didn’t know what it would become but I couldn’t pass it up.  It turned into a row counter!  I’d been wanting to try my hand at these for some time.  So simple and quick. I WILL be making my own.  Now Maegwin has a counter to attach TO her knitting and count up to 100 rows! (I actually pondered keeping this for myself…)
Maegwin said she likes pinks, yellows and peaches.  I found a travel mug with colorful circles to drink her tea in, like the tea I included .  A few smelly things were a butterscotch candle and wonderfully delicious citrus splash soap molded into a sheep that I found at an LYS.  The soap is locally made, which I love.   There is also an Iowa magnet. :) 
Other cupcake items included cupcake fridge magnets and a pink and blue cupcake luggage tag.  And of course, there was yarn.  A lovely, variegated pink skein of Lorna’s Laces (How awesome that an LYS near me sells this stuff!)

Now for the knits. The cupcake pincushion was made from Lily Sugar ‘n’ Cream Ombres in Chocolate Ombres (cupcake wrapper), Berroco Vintage in Tidepool (frosting) and Ella Rae Milky Soft in Red (cherry).  My tomato pincushion may have been a bit big, but I think it turned out okay. 

The bobbles on the frosting were a bit fiddley.  They still really want to creep back inside to hide.  I tried using a yarn needle to pull them to the front, but they’re not convinced yet.  I don’t know if my knitting wasn’t tight enough around that edge and so there were holes for the bobbles to escape through?
And saved for the very last, my favorite, the cupcake hat.  I knew the ribbing would be brown (for chocolate), but what for the frosting?  Then I remembered I had some hand-painted yarn from when my sister was home last summer and we dyed yarn for her birthday present.  I call the colorway Raspberry Truffle and it was perfect!  This is one of my favorite hats to date!  I will be making more things with this yarn (now that I remember it’s there)! 


And I don’t know about you all, but I love the picot edging and how it changes colors. 
I replaced the cherry with a crocheted chocolate kiss, which seemed fitting.  Overall, I am in love with this hat.  (As was Squishy…I need to make him one now!)
This was a wonderful swap experience and I’m glad that I got the chance to knit something I may not have knit otherwise.  This is likely going to be my last swap for awhile.  I need a break (and my bank account wouldn’t mind) and the summer is a great time to take it. I will return in a few months when things feel a bit more balanced.  :) 

Friday, June 24, 2011

Hooked on Handspun

I think I’ve mentioned a time or two that I’ve the craving to knit baby sweaters.  Piles and piles of baby sweaters.  I tried to be patient and wait until we knew whether we were having a boy or a girl.  But my willpower is not that strong.

Now, many of you, I’m sure, have the pleasure of seeing something from start to finish because you spin.  I, on the other hand, do not.  I’ve never spun yarn, although I’d love to try one day.  But I did have the opportunity to see a beautiful pile of roving transform into a beautiful little sweater. 

Back before Easter, I joined in on an Easter swap (do you remember?).  My swap partner was Susan B. Anderson.  Yes, I know, I talk about her a lot on this blog.  She’s completely inspirational and I’d love to meet her one day.  (In the knitting world, she’s a celebrity, and one who’s on the top of my list!)  I was so excited to have Susan to spoil.  Susan had mentioned on her blog wanting to try the roving from Maine Woods Yarn & Fiber.  So I found some very spring-like roving named Hyacinth in blues, yellows, purples, and a tiny bit of green.  Off it went to Susan’s home.
I read on Susan’s blog about how she spun it up and enjoyed the yarn, and I admired all her spinny goodness (it’s nice to see someone appreciate a gift you’ve given).  So you can imagine how shocked I was when one day I get a text from Mr. Man telling me I have a package from Susan Anderson on our kitchen counter!  What in the world could it be??  Why handspun yarn of course!!  Susan had sent me back the yarn she’d spun from the fiber I sent her.  (Along with another little treat, a Spud & Chloe tape measure that I love!)

My plan was to find a pattern, like a shawl or fingerless mitts or a hat, for me, myself and I.  This was, after all, special yarn.   I perused every day, several times a day it seemed.  I'd pick out a pattern and then change my mind.  Find another pattern, change my mind again.  (Do you know where this is going?)  Now is a good time to ask - do you find a pattern and then the yarn to match, or do you find yarn you love and let it speak to you and tell you what it wants to become?  I usually am of the former group.  I have a pattern I've been loving, and then match it to the perfect yarn.


This is the first time I've had yarn tell me what it wants to become.  It didn't just tell me...it was screaming at me!  This had to be a baby sweater.  So the quest was on.  I landed on the free pattern, Puerperium Cardigan.  But it was only written for newborn.   But she'd expanded the pattern to 2+ years, so I purchased Beyond Puerperium, and cast on for the 0-3 month size.

This sweater flew off the needles! It was so fun to see how the yarn changed and what the cardigan became.  In my opinion (and Mr. Man's), this is a girly sweater with the purples, yellows and blues.  So after a good blocking....


.....it deserved girly buttons!  I found these at an LYS I recently found - between the flowers and the polka dots i think it's perfect. :)
Like I said, many of you have seen a project from roving to yarn to project to done.  Now I have too, and I will admit that I'm hooked on handspun.  :)