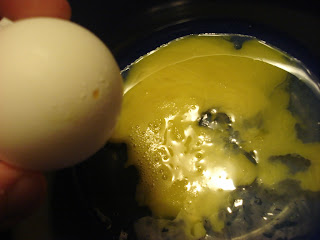
Yesterday I tried and successfully blew out 2 eggs! Now, you may ask, why in the world would she do that? Simple answer: because I could. :D Lengthy answer? I've always wanted to learn - for no other reason than to know how it was done. I've always marveled at decorated eggs and could never figure out how they emptied them. No one wants a raw egg stinking up their house just because it looks pretty! And I've finally found a couple projects that would lend themselves to using blown out eggs. The process is surprisingly simple.
Most eggs are blown out using one of two techniques: 1 hole vs. 2 holes. I used the 2-hole method since I did not have a syringe & needle needed for the 1-hole method. So in case anyone is curious, I thought I'd share how it was done. (There are links in the post to direct you to more official explanations if you'd prefer). (Pictures to come later tonight!)
Supplies:
Needle, pin or tack (anything to puncture the egg)
Egg
Bowl
Water source

1. Wash your hands with warm, soapy water. Remember that raw eggs can carry salmonella and no one wants to deal with that issue. So be sure your hands are clean and you have a clean work surface.
Clean Eggs
2. With a clean egg and your puncturing tool (in my case a push-pin/tack) puncture one end of the egg. I start with the more rounded end as the tack didn't slip as much. Hold the egg in your hand while puncturing. Placing the egg against a hard surface will crack the shell when pressure as applied to the egg. If filling your egg with an item make sure the opening is large enough to fit the item through the hole (I made one egg large enough to fit seed beads through the hole). The resulting hole should be large enough for the contents to filter through out. (e.g. least twice the size of the original hole)
Punctured egg
Larger hole - 2x original size
3. Turn your egg over and repeat on the other end. Don't worry about the hole on the bottom - the egg will not leak out.
Second hole
4. Insert your pin or needle into the hole to pierce the yolk. By doing so, it allows the yolk to flow more easily through the hole. If your piercing tool is not long enough to reach the yolk, this can be done after all the egg white has been blown out of the shell and the yolk is sitting on the bottom of egg.
5. Place your bowl in front of you. Place your lips over one of the holes you have made (I prefer blowing into the smaller hole and letting the contents flow out of the larger hole) and steadily blow air into the egg, forcing the contents out of the shell. Be patient as this may take a few tries before any egg pushes through the hole. If you cannot get the contents to come out, make your hole larger and try again. The egg white will exit the shell first, then the yolk. Consistent air pressure ensures your egg will not crack and the shell will remain intact.
Blowing out egg into bowl
6. Rinse your shell under cold running water, making sure water gets into the shell. (Hot water will result in cooking the protein in the shell). I use the sprayer to fill the shell with water. Place your fingers over the 2 holes and shake well.
Filling & rinsing w/ water
Shake well
7. Place your mouth over the hole and blow out the water. Rinse 3 times.
8. Bake the uncovered, empty shell at 300F for 10 minutes to harden the shell for handling. (This will also dry the interior of the egg!) Alternatives: place in microwave for 15-30 seconds or drain dry for 2-3 days.
Now you're ready to start your project!
Tips:
- Keep a washcloth or paper towels nearby and regularly clean the egg of any raw contents. (Sometimes it's necessary to resituate yourself and the egg. I don't like slimy eggs!)
- Room temperature eggs are easier to use because the contents are less stiff and flow more freely from the shell.
- This seems like common sense, but use a dry towel, paper towel, or oven mitt to remove the hot egg from oven or microwave!
- Place in bowl when heating in microwave, or small dish when heating in oven to prevent the egg from rolling around.

- Don't waste the eggs! Cook them up and enjoy!
Click on the links below for additional how-tos:
One-Hole Technique
One-Hole Technique 2
Two-Hole Technique
Learn something new every day, right? :) I don't know why, but doing this last night made me extremely happy. I felt so accomplished! :)


That is super-cool! When do we find out what project you're doing? :)
ReplyDeleteVery soon! :) Once it's finished I'll be posting. :)
ReplyDelete